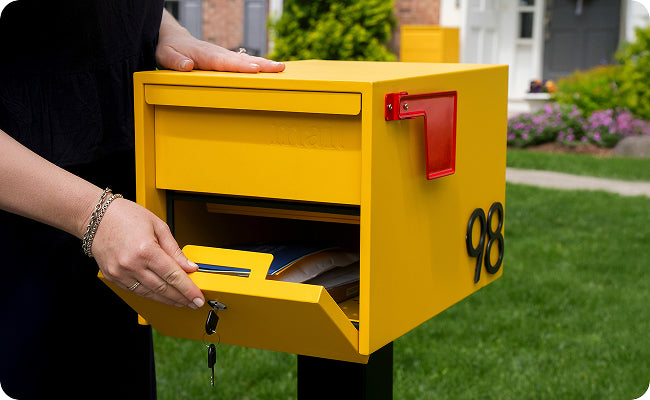
About twenty minutes from open box to done. A clean, level mailbox on the post you already have.
Already have a 4×4 post in the ground? Good. The Adoorn Surface Mount Plate gives your new mailbox a clean, solid connection to it. No digging. No concrete. No starting over.
The plate fastens to the top of any existing 4×4 wood post and creates a wider, steadier footprint. Less sway over time. A mailbox that stays level through every season.
Lay everything out before you start. A 20-minute install gets messy fast when you’re chasing a dropped washer in the grass.
Tools you’ll need
Drill with ¼" bit
Wrench or socket wrench
Level
Four 5/16" bolts (use the hardware that came with your post, or pick up a set at any hardware store)
Surface mount install on an existing 4×4 post, finished.
02Step 1 · Center the plate on your post
Square to the post. Square to the curb.
Set the plate flat on top of your 4×4, centered front-to-back and side-to-side. Take a few steps back and check it from a distance. If it reads even from the curb, you’re good.
If your post’s top-mount holes already line up with existing holes on the plate, jump ahead to Step 3.
Overhead view of the Surface Mount Plate and its center cluster of mounting holes.
03Step 2 · Match the holes and pre-drill
Four pilot holes through the center cluster.
If your post doesn’t have pre-drilled holes, this is the step that creates them.
Mark the four holes at the center cluster of the plate with a pencil. This center cluster is where you’ll fasten the plate down into your 4×4 post.
Check orientation before you drill. Set the plate so the shorter edge runs parallel to the mailbox door. This keeps the mailbox squared up to the curb once it’s mounted on top.
Pre-drill four pilot holes with your ¼" bit and wipe away the debris. Pilot holes keep the wood from splitting when you drive the screws in, and they make the final tightening pass cleaner.
Plate set on a 4×4 post in install position, oriented with the short edge parallel to the curb.
04Step 3 · Bolt it down
One pass. Inside the mailbox, through the plate, into the post.
This is the step that locks everything together in one pass.
01Set the mailbox in place
Place your Adoorn mailbox on top of the Surface Mount Plate, lined up so the door faces the curb.
02Drop the screws from inside the mailbox
Open the mailbox door. From the inside of the mailbox, drop the four 5/16" screws into the holes on the mailbox floor. Each screw runs from inside the mailbox, down through the plate’s center cluster, and into the pilot holes in your 4×4 post.
03Tighten in a cross pattern
Fasten each screw to the post with your socket wrench. Work in a cross pattern rather than going around in a circle. It keeps the mailbox flat and even as each screw pulls down. Tighten firmly until the mailbox sits flush and steady. Snug is enough.
Mailbox bolted down through the center cluster, sitting flush on the plate.
Finished
A wider, steadier footprint. A mailbox that holds its line.
The curb will show it. A mailbox that sits perfectly level is the small detail guests notice without knowing why.
05Care & maintenance
Built to last. A little upkeep goes a long way.
Your Adoorn mailbox is built to last, and designed to look good doing it. A little upkeep goes a long way.
Preserve the finish
Apply a clear car wax to the exterior as needed to protect the color and coating.
Touch up damage
If bare metal becomes exposed, apply a protective paint (such as Rust-Oleum®) promptly to prevent rust.
Maintain the locks
For locking models, apply a lubricant (such as Tri-Flow®) to the interior of each lock twice per year.
Clean
Mild soap and water. That’s it.
06Complete the look
Address numbers, easy install.
Finish the curb with 4" Mailbox Numbers so carriers and guests can read your address at a glance.
Will the Surface Mount Plate work on my existing 4×4 post?
Yes. The plate is designed to mount on the top of any existing 4×4 wood post. If the top of your post is flat, square, and structurally sound, you are set.
Do I need to remove my old mailbox first?
Yes. Remove the existing mailbox and any old mounting hardware from the top of your post. The Surface Mount Plate replaces whatever was holding the old box on, and it needs a clean surface to sit flush against.
Which holes do I use to mount the plate?
Use the four holes in the center cluster of the plate. The outer four-hole pattern is for different Adoorn mounting configurations and should not be used for the Surface Mount Plate install. All four screws drop from inside the mailbox, through the center cluster of the plate, and into pilot holes in your post.
How do I know which edge of the plate faces the curb?
Orient the plate so the shorter edge runs parallel to the mailbox door. The mailbox door faces the curb. If the plate is square to the post and the short edge runs parallel to the curb, the box will be square to the street once it is mounted.
What if my post already has pre-drilled holes that line up with the plate?
Skip the pre-drill step. If the holes on your post line up with the holes in the plate’s center cluster, jump straight to bolting the mailbox down.
Can I use this on a 6×6 post?
The Surface Mount Plate is sized and engineered for a 4×4 post. For larger or non-standard post sizes, contact our team before drilling so we can confirm fit and warranty coverage.
08Quick reference
Specs and numbers at a glance.
Install time
About 20 minutes
Compatible post
4×4 wood post (top must be flat and sound)
Tools needed
Drill with ¼" bit, wrench or socket wrench, level
Hardware
Four 5/16" bolts (use what came with your post, or any hardware store)
Pre-drill bit
¼"
Mounting holes
Center cluster only (4 holes). Outer cluster is NOT used.
Plate orientation
Shorter edge parallel to the mailbox door, door faces the curb
Tightening pattern
Cross pattern, snug to flush, do not over-crank
Warranty note
Do not drill new holes in the mailbox (voids warranty)