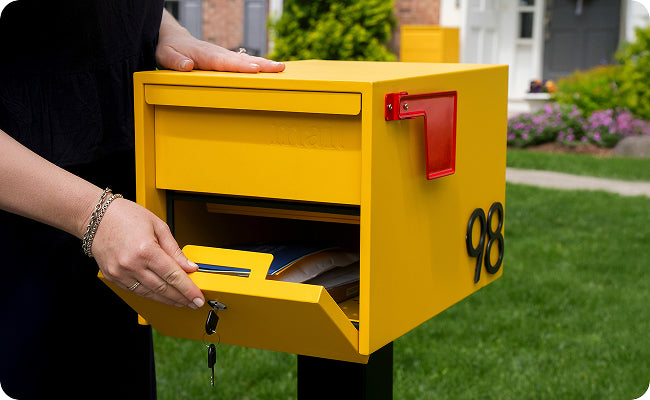
One post, two mailboxes, one clean look at the curb. A square, sturdy install for duplexes, shared driveways, and side-by-side setups.
Whether you’re setting up mail for a duplex, sharing a driveway with a neighbor, or you want both boxes to line up the way they should, the Adoorn Dual Mounting Post keeps everything square, sturdy, and intentional.
This guide covers both products in the dual setup: the full Dual Mounting Post, which sets into the ground and holds two boxes, and the Dual Mounting Post Spreader Bar, the steel bar that does the actual two-box mounting and attaches to an Adoorn In-Ground Post or your own existing post.
Find your path below, follow the steps in order, and you'll end up with a two-box install that looks like it was always meant to be there.
I bought the Dual Mounting Post (the full in-ground post). You’ll set the post in concrete first, then attach the spreader bar and your two mailboxes. Start at Path A.
I bought only the Spreader Bar. You already have a post, either an Adoorn 51" In-Ground Post or a wooden post (the bar is not compatible with the 41" Surface Mount Post). You’ll attach the bar to it, then mount your two boxes. Skip to Path B.
Both paths finish with the same three mounting steps, so you’ll meet back up at Mount Your Two Mailboxes.
01USPS placement requirements
Read this first, either way.
Before you dig or drill anything, contact your local post office to confirm placement and height. Every route is a little different, and your carrier needs to reach both boxes safely from the road.
Height from road
The mail entry point should sit 41"–45" from the road surface. For non-locking mailboxes, measure the inside surface. For locking mailboxes, measure the lowest edge of the mail entry.
Setback
The mailbox door should be 6"–8" from the curb or road edge.
Address numbers
Finish the job by adding address numbers to each box so carriers, guests, and delivery services can tell the two apart.
These are general guidelines. Your local post office may have specific requirements for your street, so always confirm before you start.
02Path A · Setting the Dual Mounting Post
From bare ground to a solid post.
This is the full setup, starting from bare ground. If you’ve installed one of our single in-ground posts before, this will feel familiar. The post goes in the same way. The only difference comes at the top, where the spreader bar holds two boxes instead of one.
Tools you’ll need
60lb bag of quick-setting concrete (and a bucket to mix it in)
Shovel (round-point for digging)
Level
Measuring tape
Wrench or socket wrench
Set the post
Take your time here. This is where the stability of both boxes starts.
01Dig the hole
Measure 16"–18" from the edge of the road or curb and dig your hole there. For a curb, subtract your curb height from 42" to find how much post should sit above ground; the rest goes below. With no curb, set the post so 41" sits above ground and dig roughly 10" deep for stability and frost protection. Keep the bottom flat and packed.
02Orient the post correctly
The open end goes down into the hole. The closed end, with the pre-drilled mount holes, faces up. Those top holes are how the spreader bar attaches later, so get this right before you pour. Once the concrete sets, an upside-down post cannot be flipped.
03Stand and plumb the post
Place it in the center of the hole and use your level to check that it’s perfectly straight in all directions.
04Mix and pour concrete
Mix the 60lb bag of quick-setting concrete per the package directions and pour it around the post, filling the hole. Work the handle of your shovel around the post to remove air pockets.
05Level one more time
Check plumb again before the concrete starts to set. Small adjustments are still possible.
06Let it cure completely
Quick-setting concrete typically cures in 24–48 hours. Don’t attach anything until it’s fully set. A weak foundation will cause problems down the road, and you’ve got two boxes riding on this one.
The spreader bar attached to the top of the in-ground post.
03Path B · Spreader Bar on an existing post
No digging. Just a solid post to mount to.
The Spreader Bar attaches to a post you already have. There’s no digging here, just a solid, level post to work with.
A quick note on hardware: your Spreader Bar includes the hardware to attach two mailboxes. It does not include the fastener that secures the bar to the post. If you’re mounting to an Adoorn In-Ground Post, that screw comes in the In-Ground Post hardware pack. If you’re mounting to a wooden post, you’ll need to supply a lag screw or bolt rated for wood.
Tools you’ll need
Wrench or socket wrench
Level
Screwdriver or driver
Center-hole fastener (the small screw from your Adoorn In-Ground Post hardware pack, or a wood-rated lag screw or bolt if you’re using a wooden post)
Confirm your post is ready
01Check the post itself
If you’re mounting to an Adoorn In-Ground Post, follow the placement and curing guidance in the 51" In-Ground Post Mount guide before you continue. If you’re using a wooden post, confirm it can carry the weight of two mailboxes and that the top is flat and square to the street.
The spreader bar fitted to an existing post with hardware in place.
04Mount your two mailboxes
Three shared steps. Same for either path.
Everyone meets back here. These three steps come straight from the install card in the box, and they’re the same whether you set a new post or used your own.
01Attach the spreader bar to the post
Using the center hole on the spreader bar and the small screw from your In-Ground Post hardware pack, fasten the spreader bar to the top of the post. Set it so the plate sits parallel with the street, which keeps both mailbox doors facing the curb. Snug it down, but don’t over-tighten.
02Find your mailbox mounting holes
Look at the bottom of each mailbox. The universal mounting holes are marked with an "X" in the center. For a dual setup, you’ll use the outer holes, spaced 3.5" x 3.5", to bolt each box to the spreader bar. (These are different from the 2.5" center holes, which are what fasten the bar itself to the post.) Position each box on its side of the spreader so the 3.5" holes line up with the holes in the bar, doors facing the street.
03Bolt down both boxes
Using the provided hardware, drop the four bolts down through the floor of each mailbox and through the spreader bar. From underneath, thread a nut onto each bolt and tighten with your wrench until snug and secure.
Check alignment. Step back and confirm three things on both boxes: each sits square to the road, each door opens and closes cleanly without rubbing, and the pair reads level across the top. Make small adjustments before a final snug pass on every bolt.
Underside view of the spreader bar on the post, showing the four outer mounting holes where the mailboxes bolt down.
Finished
Two boxes, one post, square to the street.
Step back and take a look. A shared mail setup that holds its line and looks considered from the road.
05Care & maintenance
Built to last. A little upkeep goes a long way.
Your Adoorn mailboxes are built to last, and designed to look good doing it. A little upkeep goes a long way.
Preserve the finish
Apply a clear car wax to the exterior as needed to protect the color and coating.
Touch up damage
If bare metal becomes exposed, apply a protective paint (such as Rust-Oleum®) promptly to prevent rust.
Maintain the locks
For locking models, apply a lubricant (such as Tri-Flow®) to the interior of each lock twice per year.
Clean
Mild soap and water. That’s it.
06Complete the look
Two boxes, two address numbers.
Finish your dual setup with 4" Mailbox Numbers on each box so carriers and guests can tell them apart at a glance.
What is the difference between the Dual Mounting Post and the Spreader Bar?
The Dual Mounting Post is the full in-ground post that sets into concrete and holds two mailboxes. The Dual Mounting Post Spreader Bar is the steel bar that does the two-box mounting and attaches to an Adoorn In-Ground Post or your own existing post. If you bought the full post, you set it in the ground first. If you bought only the bar, you attach it to a post you already have.
Can I mount two mailboxes on one post?
Yes. The Adoorn Dual Mounting Post Spreader Bar mounts two mailboxes side by side on a single post. Set the spreader bar parallel to the street so both mailbox doors face the curb, then bolt each box to its side of the bar using the outer universal mounting holes.
How do I attach the spreader bar so both mailboxes are straight?
Fasten the spreader bar to the post through its center hole so the plate sits parallel with the street. This keeps both mailbox doors facing the curb. Check that the bar is level before tightening, then confirm both boxes read square to the road and level across the top before your final pass.
Which mailbox holes do I use to mount to the spreader bar?
Look at the bottom of each mailbox for the X-marked center and use the outer 3.5" universal mounting holes to bolt each box to the bar. Drop the four provided bolts through these holes and the spreader bar, then secure with the nuts underneath. The 2.5" center holes fasten the bar to the post. Do not drill new holes, which exposes untreated metal and voids the Adoorn warranty.
Can I use the spreader bar on my existing mailbox post?
Yes. The Spreader Bar attaches to an Adoorn 51" In-Ground Post or a wooden post, but it is not compatible with the 41" Surface Mount Post. The bar includes hardware to attach two mailboxes. The fastener that secures the bar to the post comes with the In-Ground Post, while a wooden post needs a wood-rated lag screw or bolt.
What is the USPS height requirement for a dual mailbox setup?
USPS guidelines recommend the mail entry point sit 41"–45" from the road surface, with each mailbox door 6"–8" from the curb or road edge. Always confirm placement with your local post office, since route-specific requirements may apply.
08Quick reference
Specs and numbers at a glance.
Two products covered
Dual Mounting Post (full in-ground post) and Spreader Bar (attaches to an existing post)
First step (full post)
Call 811 before digging
Mailbox height
41"–45" from road surface to mail entry (USPS guideline)
Setback
6"–8" from curb or road edge to mailbox door
Post location
16"–18" from road edge
Concrete needed (full post)
60lb bag of quick-setting concrete
Concrete cure time
24–48 hours (do not attach until fully cured)
Spreader orientation
Plate parallel with the street, both doors facing the curb
Mailbox mounting holes
Outer 3.5" x 3.5" holes bolt each box to the bar (2.5" center holes fasten the bar to the post)
Spreader bar specs
Galvanized steel, powder-coated black, 26"W x 6"D x 0.25"H, 3.875 lbs
Compatibility
Adoorn 51" In-Ground Post or a wooden post (not the 41" Surface Mount Post)
Hardware
Bar includes hardware for the two mailboxes. The bar-to-post fastener comes with the In-Ground Post. Wooden posts need a wood-rated lag screw or bolt.
Warranty note
Do not drill new holes in the mailbox (voids warranty)
Tools needed
Shovel, level, measuring tape, wrench or socket wrench, driver